Step-by-Step Workflow for recording meetings and events on teams and how to access the recording.
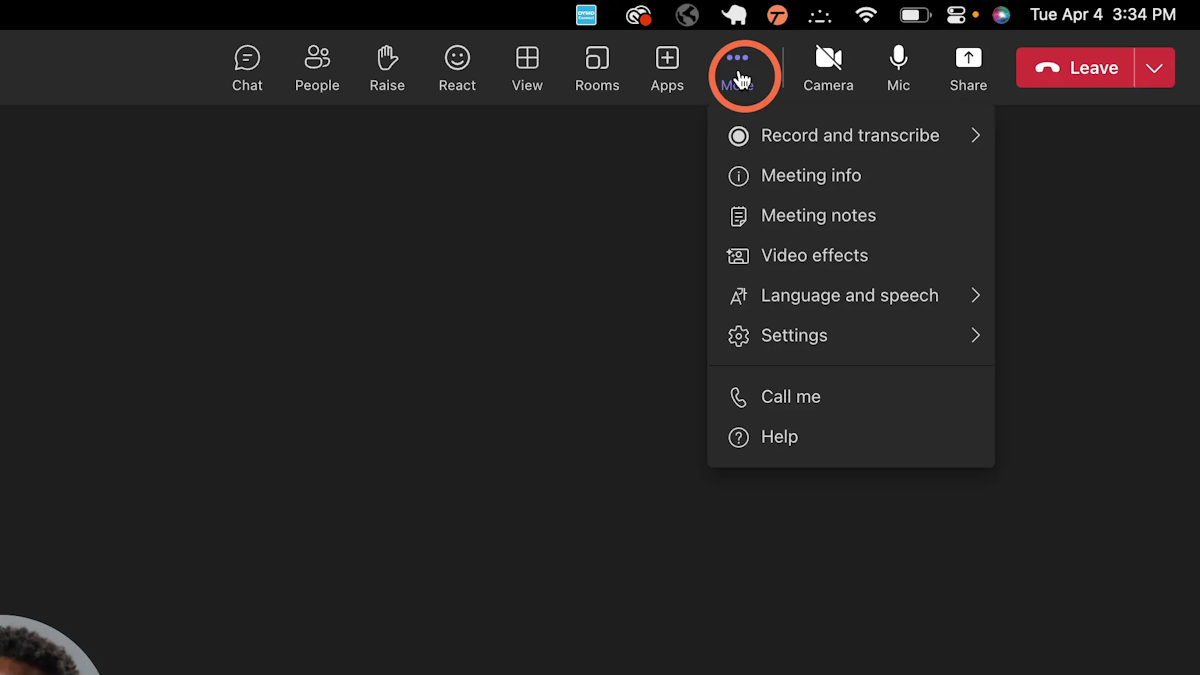
1. At the beginning of your Teams Meeting select 'More'
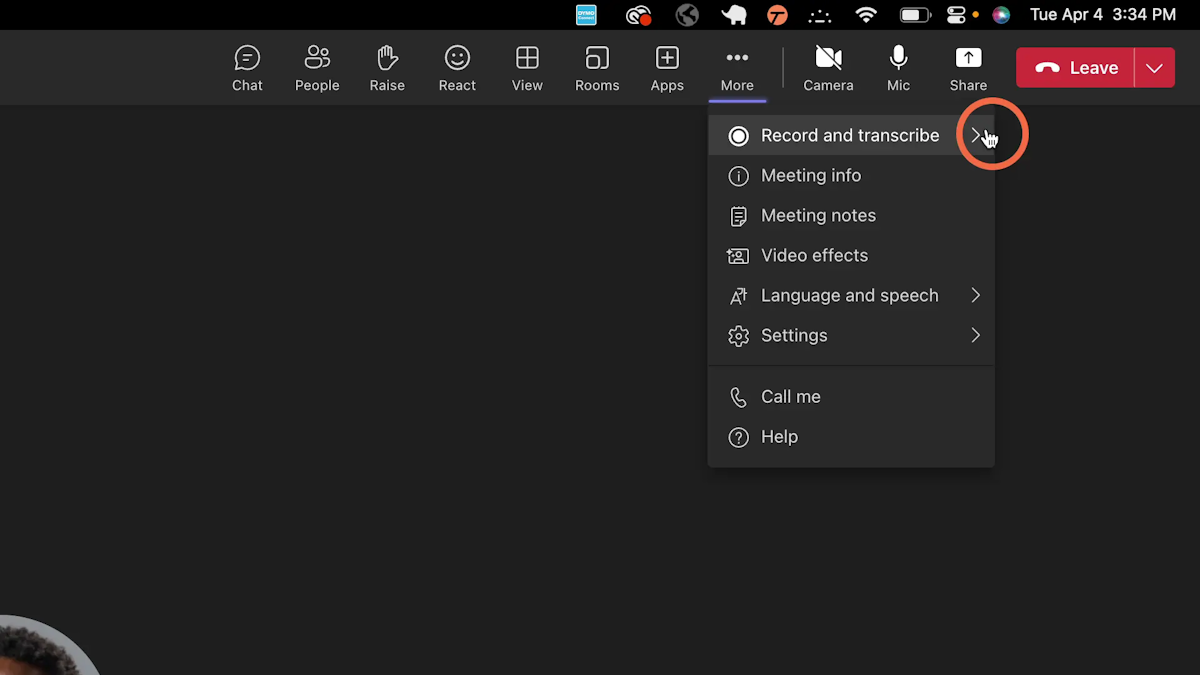
2. Select 'Record and Transcribe' and begin to record your meeting
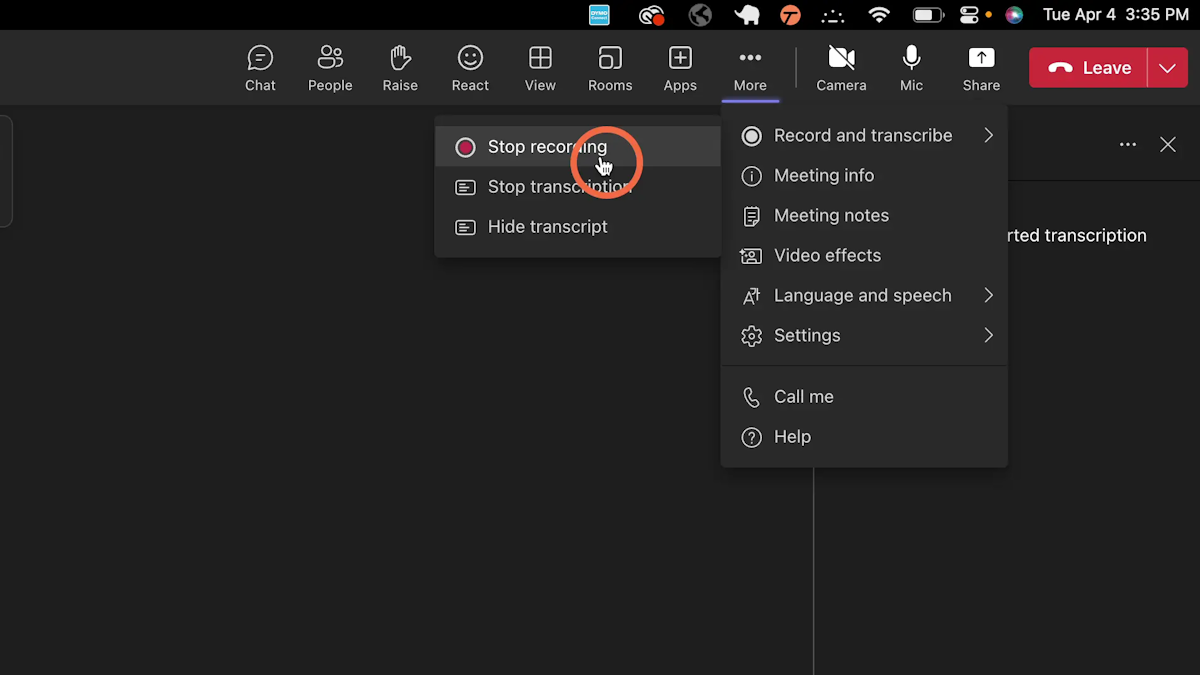
3. Before ending your meeting be sure to go back to 'More', 'Record and Transcribe', and select 'Stop Recording' After this you may leave you meeting as you wish
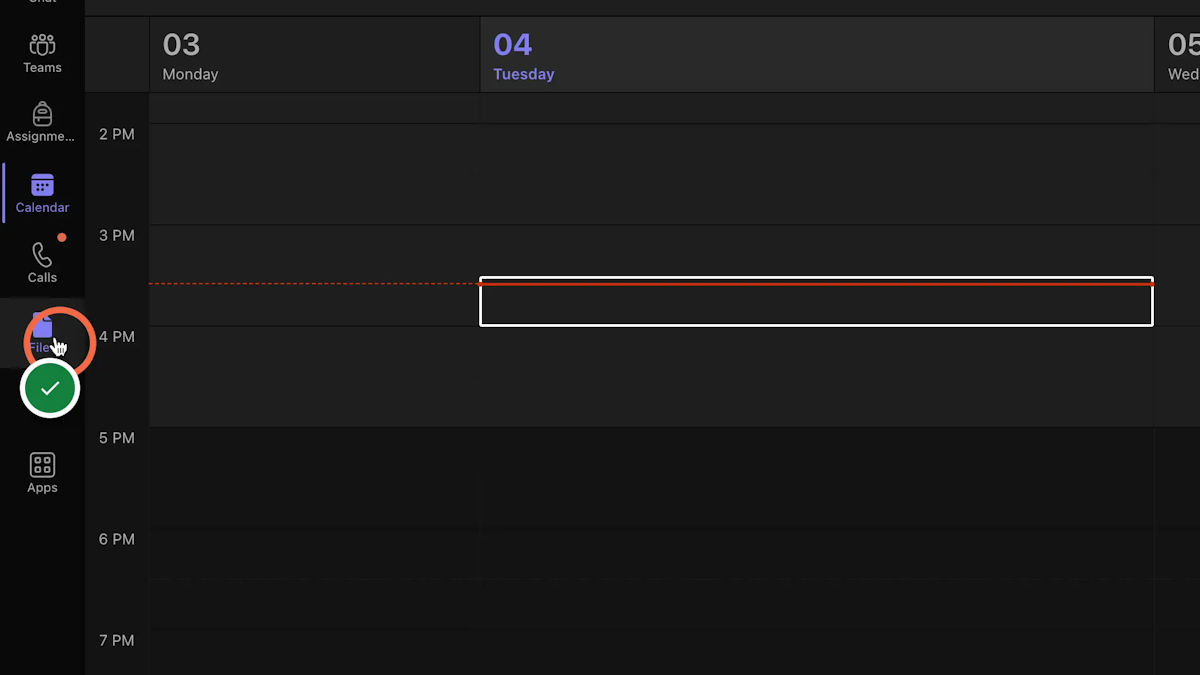
4. When you are ready to go back to your recording, Select 'Files' on the left-side menu in Teams
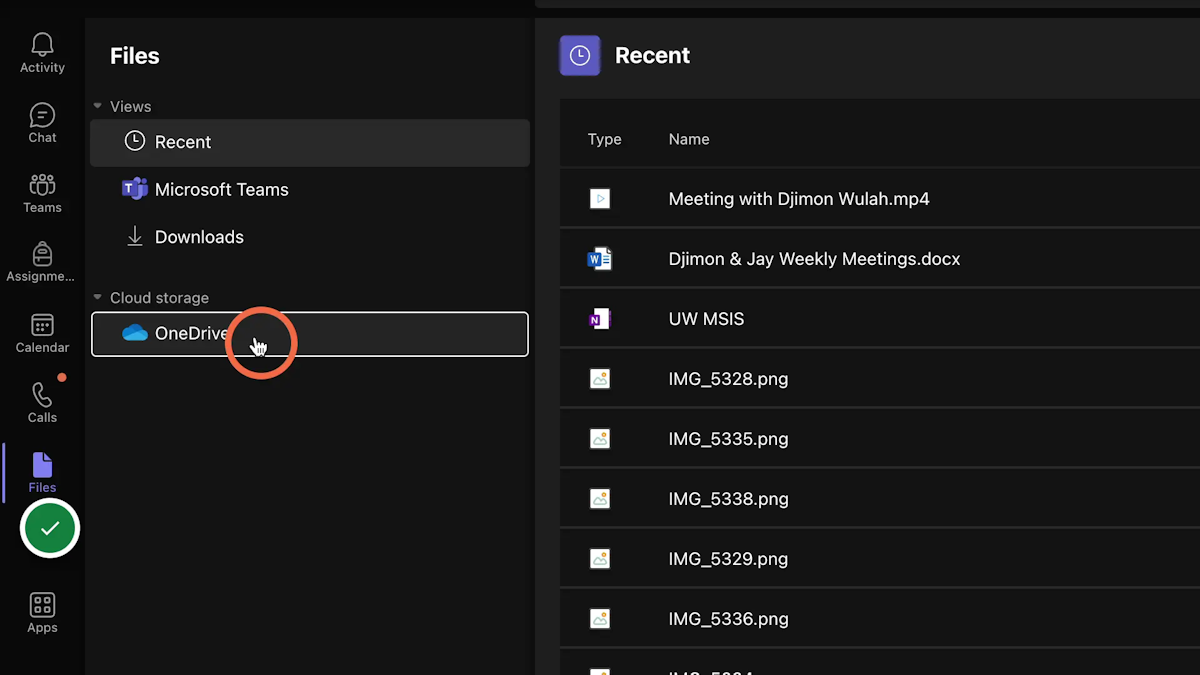
5. Select OneDrive
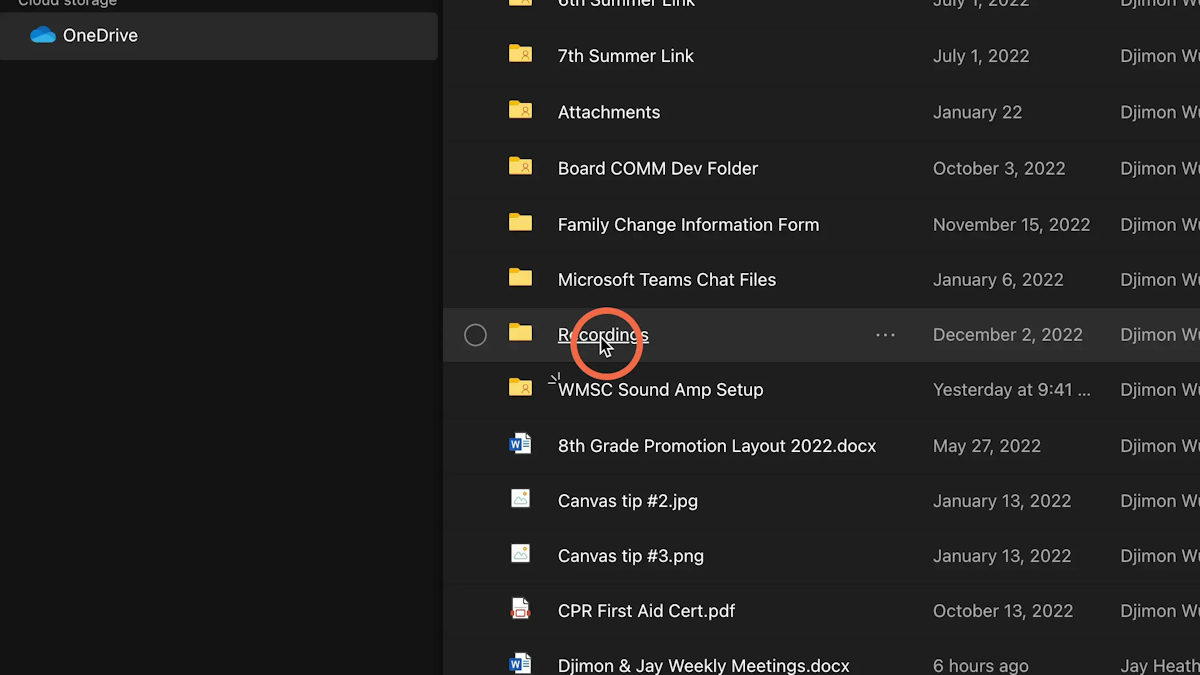
6. Navigate to and select your Recordings folder (This is automatically created)
7. You will find your recording here, you can decipher which one is the recording you are looking for from the 'Modified' column ex. I quickly went to find my recording so I know it is the one from 'A few seconds ago'
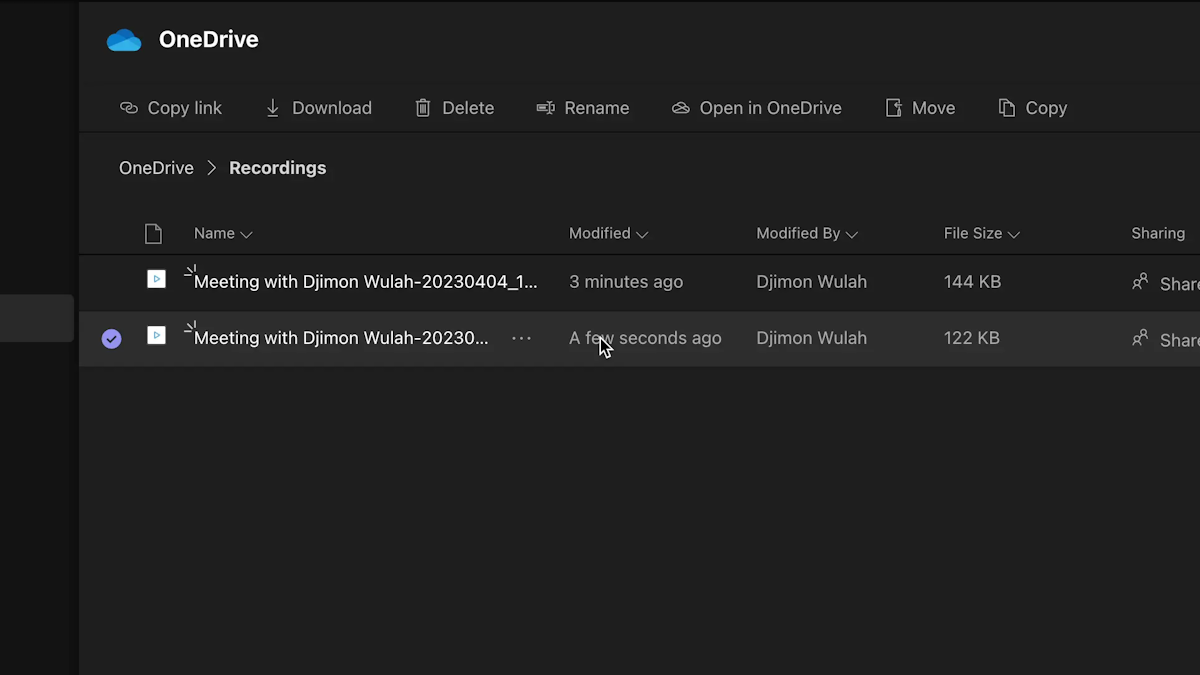
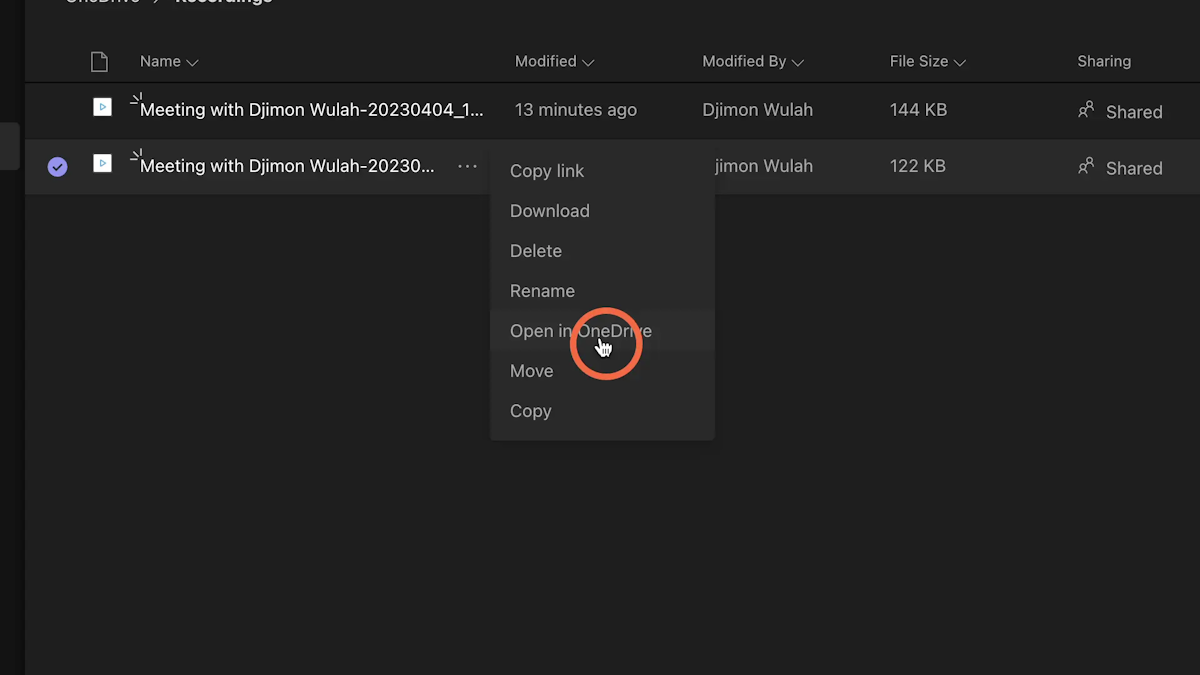
8. At this point you have now located your recording, but "What if I want to Share!!!???" Select the 'option ellipses' and 'Open in OneDrive'
9. You are now presented with the same OneDrive folder in the browser, select 'Share' in the toolbar and give folks the second chance to receive all the valuable information from your Teams Meeting
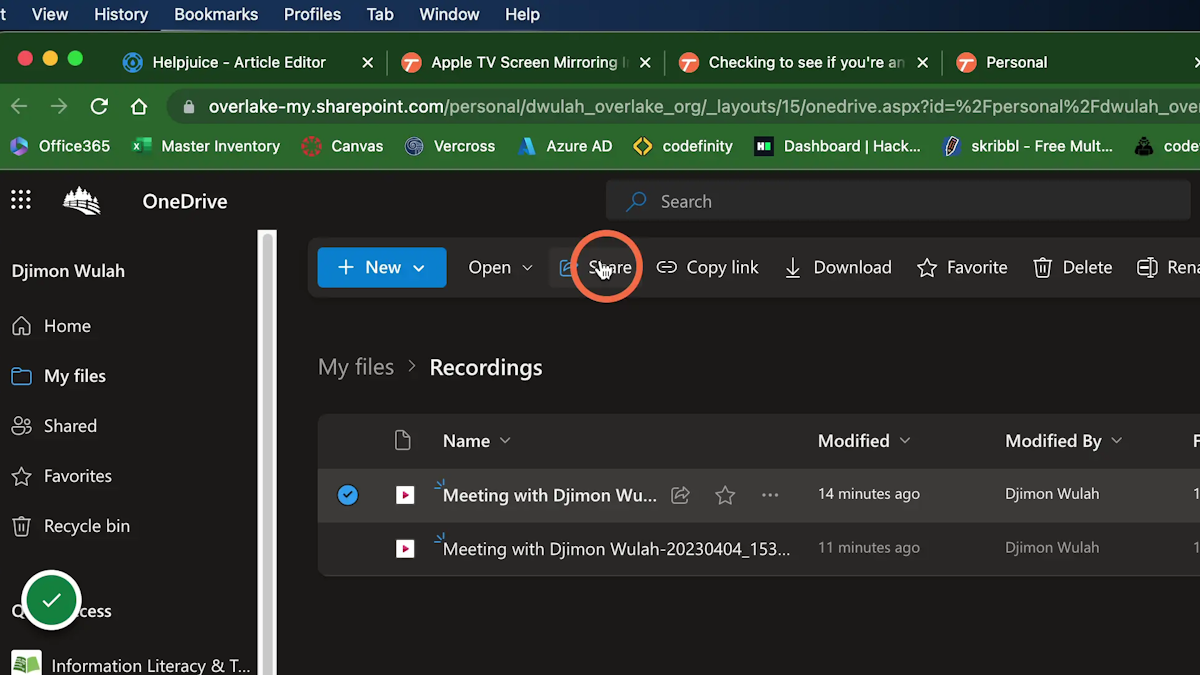
Sharing recording links
Depending on the target recipients of the links you may want to make changes to the access privileges of it!