Step-by-Step guide
Closely follow these instructions to help any Check-out related requests.
1. If a student asks for a loaner computer, the workbench is where you can find the computers that serve that purpose. They will be charging on the divider.
Black Lenovo's are people who use Windows
Gray Airbook's are for people who use Apple MacOS

2. The storage cabinet can be intimidating at first site, here are some pointers:
- USB C Chargers
- Surface Chargers and Mice
- Calculators
- Lenovo Chargers
- Headphones

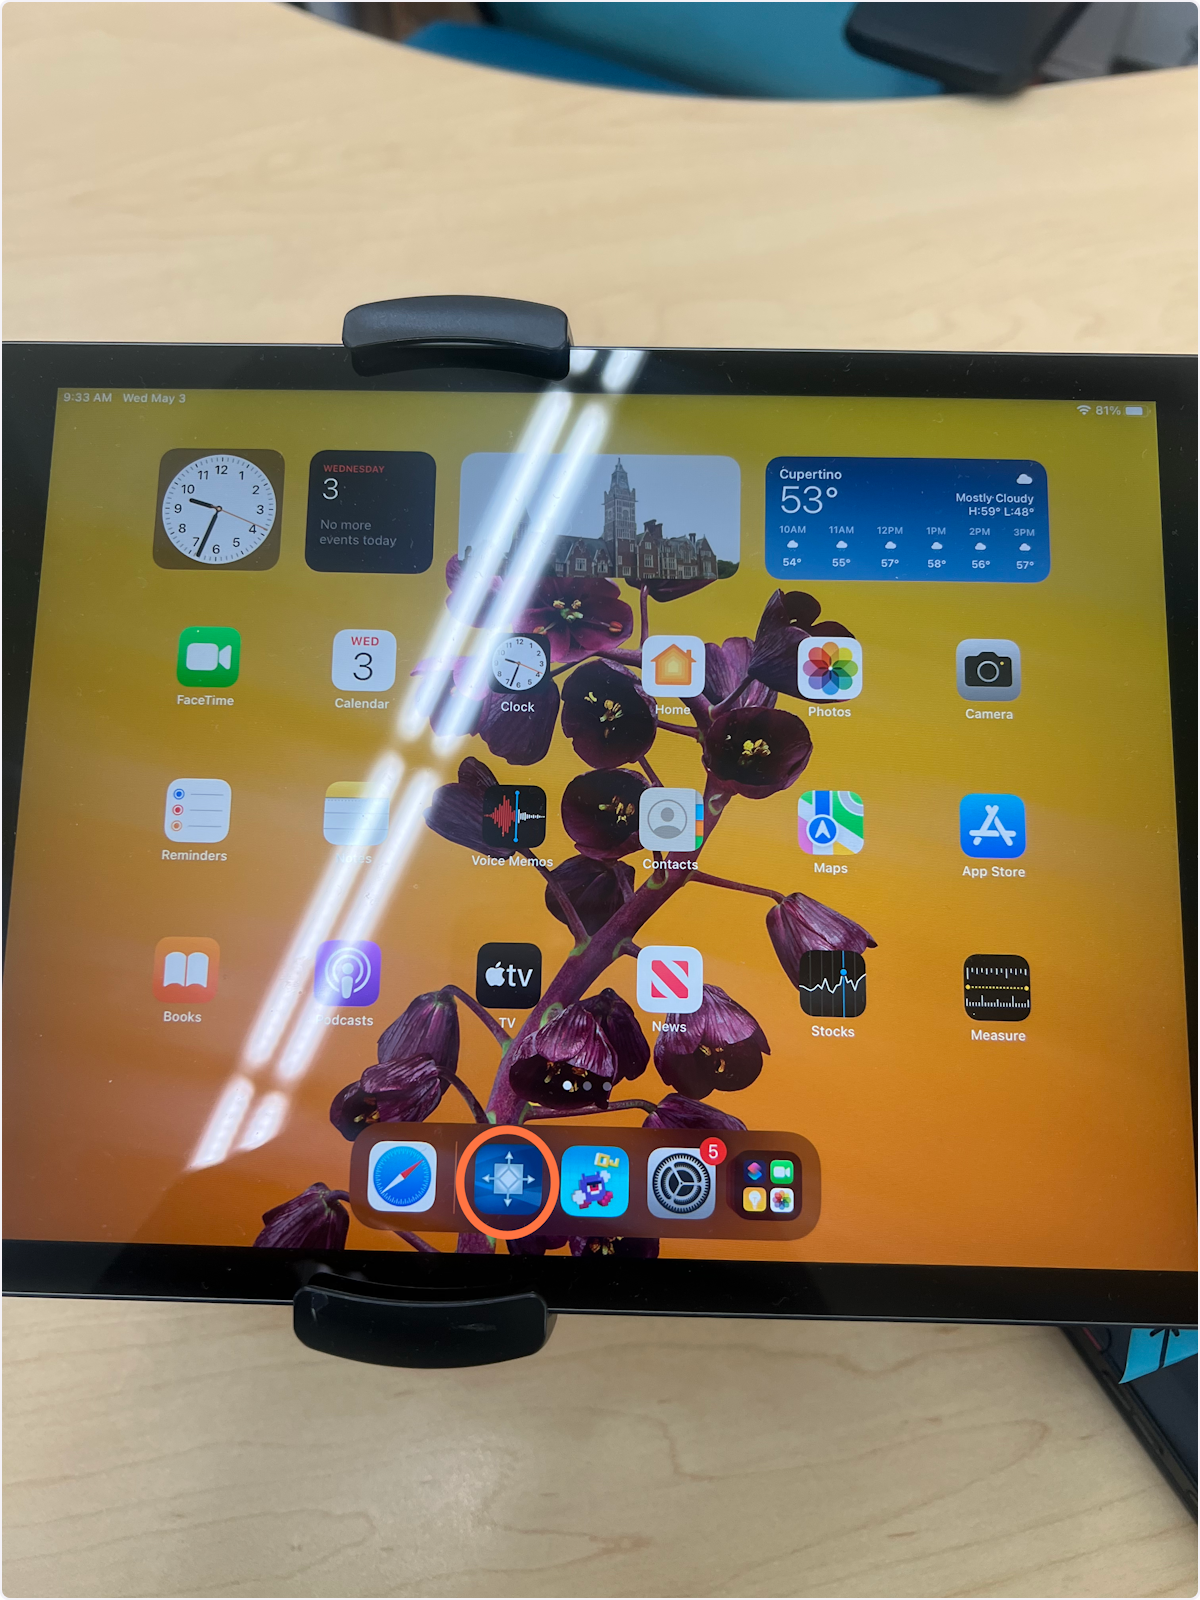
3. If you approach the iPad for checking an item out/in and you end up lost at the iPad homescreen, return back to the Follett Destiny app which can be found in the circle indicated on the bottom of the homescreen.

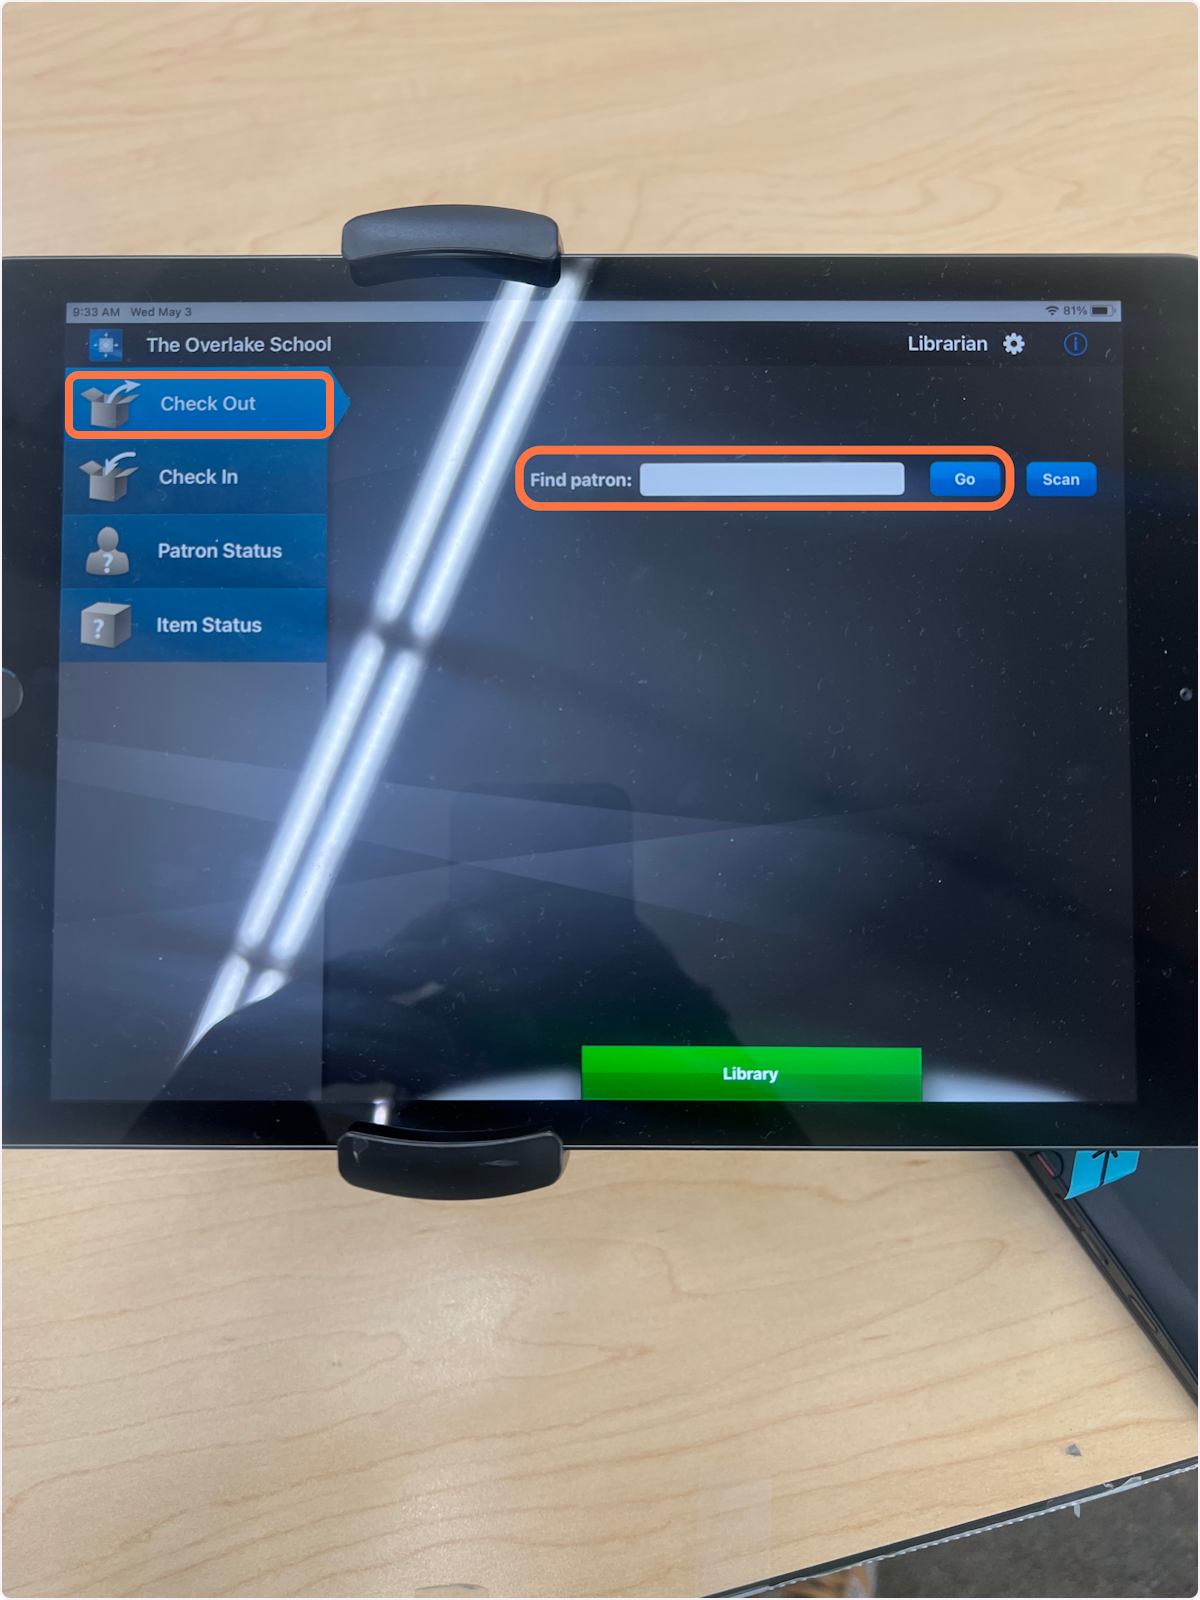
4. The difference of Check Out vs. Check In always confuses students, Check out is for items leaving the library, you first need to enter your Owl-Id (student/employee number) where it says 'Find patron' and select 'Go'.

5. After you are found as a patron you will need to scan the barcode of the item you are checking out, select scan and place the barcode of the item in the cameras view indicated by the blue arrow post-it.

6. To log students in on windows devices, they will use their own credentials:
Overlake Email
Password
If you receive an error other than incorrect password, you are likely not connected to the wifi 'Overlake', you can fix that by selecting the wifi icon indicated by the circle.

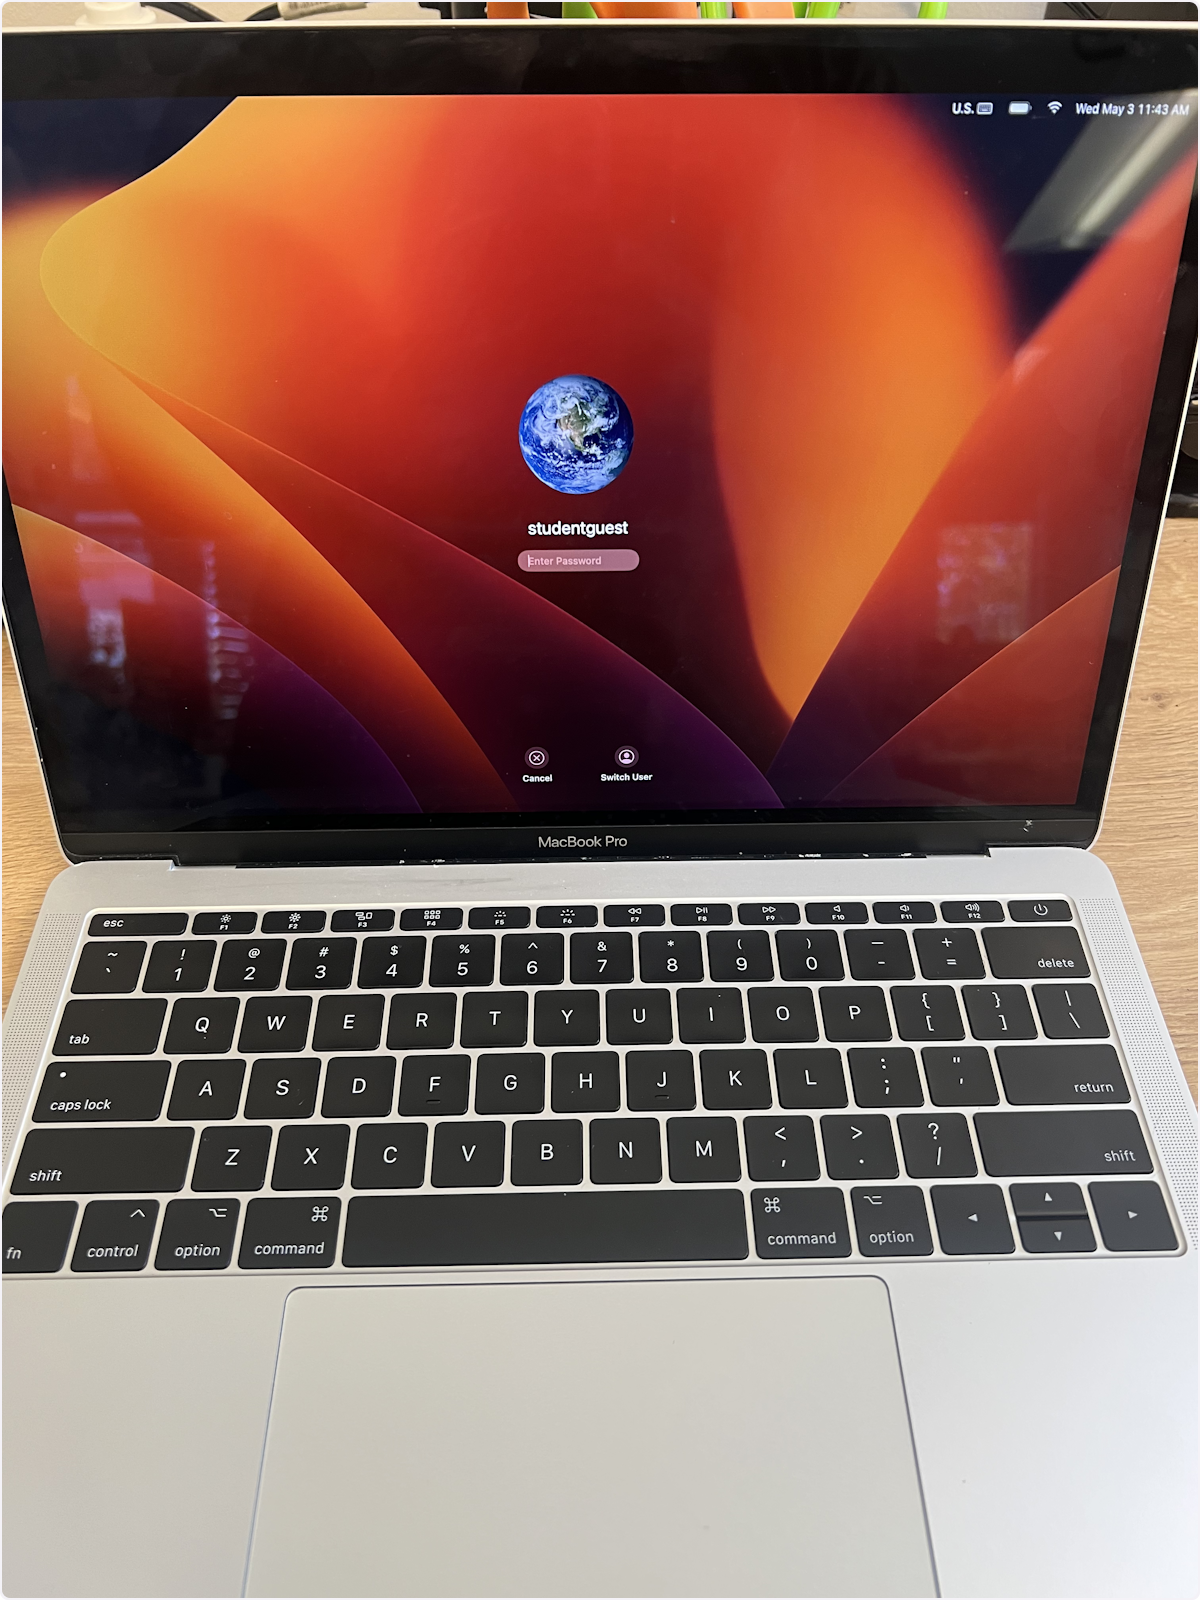
7. For mac devices, log into the 'studentguest' account with the password: 'Guest'.

8. Check in items to return items to the library Select scan and place the barcode of the device in the camera's view indicated by the blue arrow post-it. You never receive any closure on whether or not you successfully checked-in, however, 98.5% of the time, you were successful.
